Unleash Your Creativity: Learn How to Draw Floppy Dog Ears in No Time!

1. Introduction
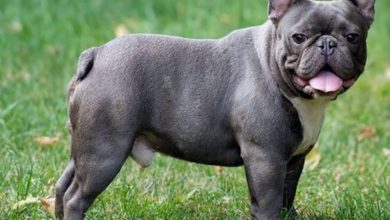
Drawing animals can be a great way to express your creativity and have fun. One of the most popular animals to draw is the floppy dog ear. Floppy dog ears are a classic feature of many breeds of dogs, and they are often used as a symbol of loyalty and friendship. In this article, we will explore how to draw floppy dog ears in detail, including what materials you will need, how to draw the outline, adding details and shading, and tips for making your drawing look more realistic.
2. What You Will Need to Draw Floppy Dog Ears
Before you begin drawing your floppy dog ears, it is important that you have all the necessary materials on hand. You will need paper or canvas, pencils or pens in various sizes and colors (including black), erasers, colored pencils or markers for adding color, and any other materials that you may want to use for shading or highlighting.
3. Drawing the Outline of the Floppy Dog Ears
Once you have gathered all your supplies, it is time to start drawing! Begin by sketching out the basic shape of the ear with a pencil or pen. Start by lightly sketching an oval shape that curves at one end; this will be the base shape for your ear. Then add two curved lines on either side of the oval; these lines should be slightly curved upwards so they create a rounded point at the top of each ear. Finally, add two lines across each ear that connect at both ends; these lines should be slightly angled so they create an arch shape at each end of each ear.
4. Adding Details to the Floppy Dog Ears
Now that you have drawn out the basic outline of your floppy dog ears it is time to add some details! Start by sketching out any folds or wrinkles in each ear using light pencil strokes; these wrinkles should be curved and not too deep so they give a soft look to your ears rather than making them appear too rigid or stiff. You can also add small “V” shapes along each curve in order to create more dimension in your drawing if desired.
5. Adding Color and Shading to the Floppy Dog Ears
Once you have finished adding details to your floppy dog ears it is time to bring them to life with color! Start by coloring in each ear with a light shade of brown; this will help define its shape even further while giving it more realism. Then use darker shades of brown (or other colors if desired) for shading around any wrinkles or folds in order to make them stand out more against their lighter-colored background. Finally, use white colored pencils or markers for highlighting areas such as points on top of each ear or along their edges if desired.
6 Tips for Drawing Floppy Dog Ears
Drawing realistic looking floppy dog ears can take some practice but here are some helpful tips:
• Use light pencil strokes when sketching out any wrinkles or folds so they don’t appear too deep or rigid
• Make sure all lines connecting points on each ear are slightly curved rather than straight in order to give them a natural look
• Use different shades of brown (or other colors) when coloring in order give them more depth
• Add small “V” shapes along curves in order create more dimension
• Use white colored pencils/markers for highlights
• Take breaks while drawing so you don’t get overwhelmed
7 Conclusion
.
Drawing realistic looking floppy dog ears requires patience and practice but with these tips anyone can learn how! By following these steps and using quality materials you should be able to achieve beautiful results every time! So grab some supplies today and get creative!
8 FAQs About Drawing Floppy Dog Ears
.
Q: How do I make my drawings look more realistic?
A: Using different shades when coloring as well as adding highlights with white colored pencils/markers can help make your drawings look more realistic! Also take breaks while drawing so that you don’t get overwhelmed!
Q: What kind of paper should I use?
A: It is best to use thicker paper such as cardstock or canvas when drawing since it won’t tear easily when erasing mistakes or adding details such as shading/highlights.
Q: Are there any special techniques I should know about?
A: When sketching out wrinkles/folds try using light pencil strokes instead of pressing down hard which can make them appear too deep/rigid looking instead! Also try using different shades when coloring which will help give more depth/dimensionality to your drawings!
9 Resources
.
Here are some helpful resources for learning how to draw better:
• YouTube Tutorials – There are many helpful tutorials available online which teach step-by-step instructions on how draw various animals including dogs with floppy ears!
• Books – There are many books available which provide detailed instructions on how draw animals including dogs with floppy ears!
• Art Classes – Taking an art class from a professional artist can provide invaluable advice on improving one’s technique when drawing animals including dogs with floppy ears!